
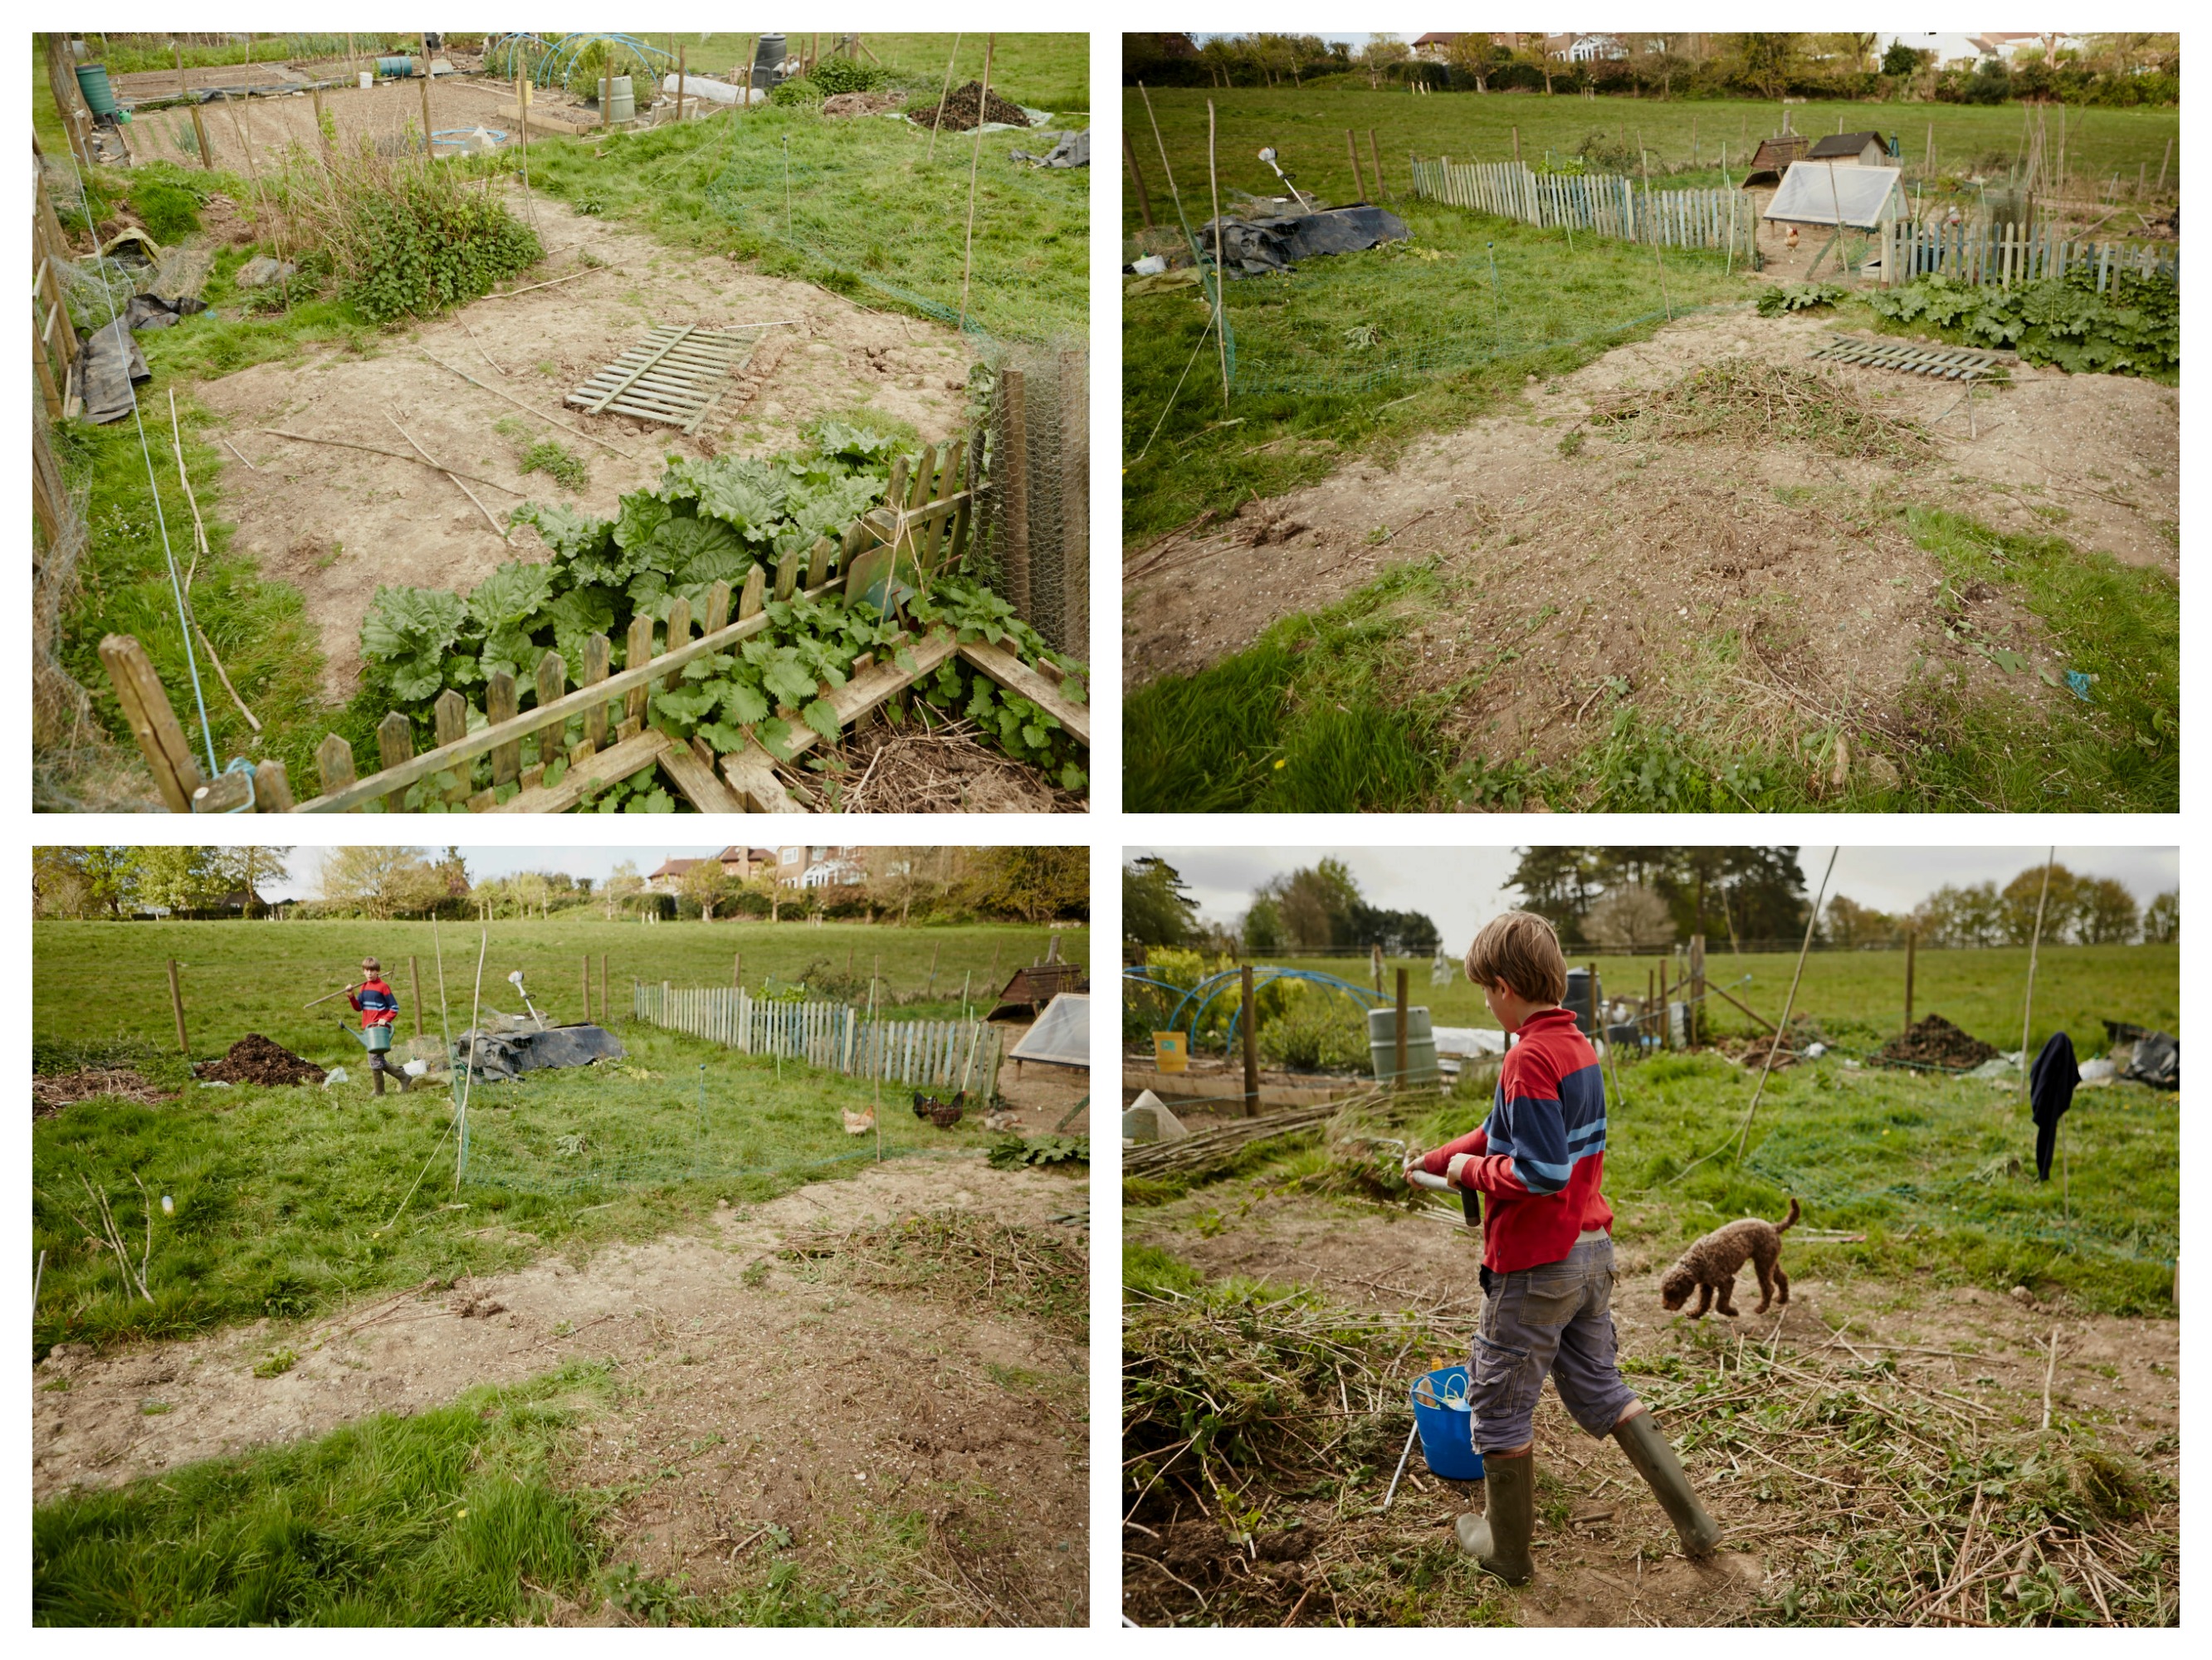
Neck high brambles, rampant bindweed, stubborn grass, broken fences, piles of rubbish and a random turf mound! Sound familiar? That was the state of our allotment garden when we got the go-ahead from our local council in April 2014 and it was very daunting to say the least. Where to begin? It was already mid-Spring and ideally, we wanted to use the space that year as a productive fruit, vegetable and flower garden.
We already had one allotment tucked down at the end of the row, surrounded by fields and opposite an overgrown patch of woodland, but we decided, very much against common sense, that we’d like a bit more space for our chickens to roam and to plant more veg! Hence the request for a second ‘plot’.
In the coming months I’ll take you through the practical ins and outs, the ups and downs, the highs and lows of creating a beautiful organic fruit, veg and flower garden from scratch. As well as this being a personal record of our sweaty endeavours(!), I also hope that you can find some little nuggets of inspiration and learn from our mistakes!
Mid Spring Plans
Hooray! We were granted a new allotment and as luck would have it, it was right next door to our old rather neglected allotment. The time felt right to throw our energies into something we had always dreamed of – creating a big, happy space for our homegrown veg and chickens and becoming as self-sufficient as possible. We were determined to do everything naturally, not just organically, but biodynamically and to make it fun for us and our children! Our budget was limited, so we had to decide where to spend and where to save – this would involve a lot of research into timber, compost, sheds, fences, paints, water butts, gravel, plants……the list was endless! And we wanted to do it as soon as possible if we were to grow, cook and eat our own veg that year. No pressure then!
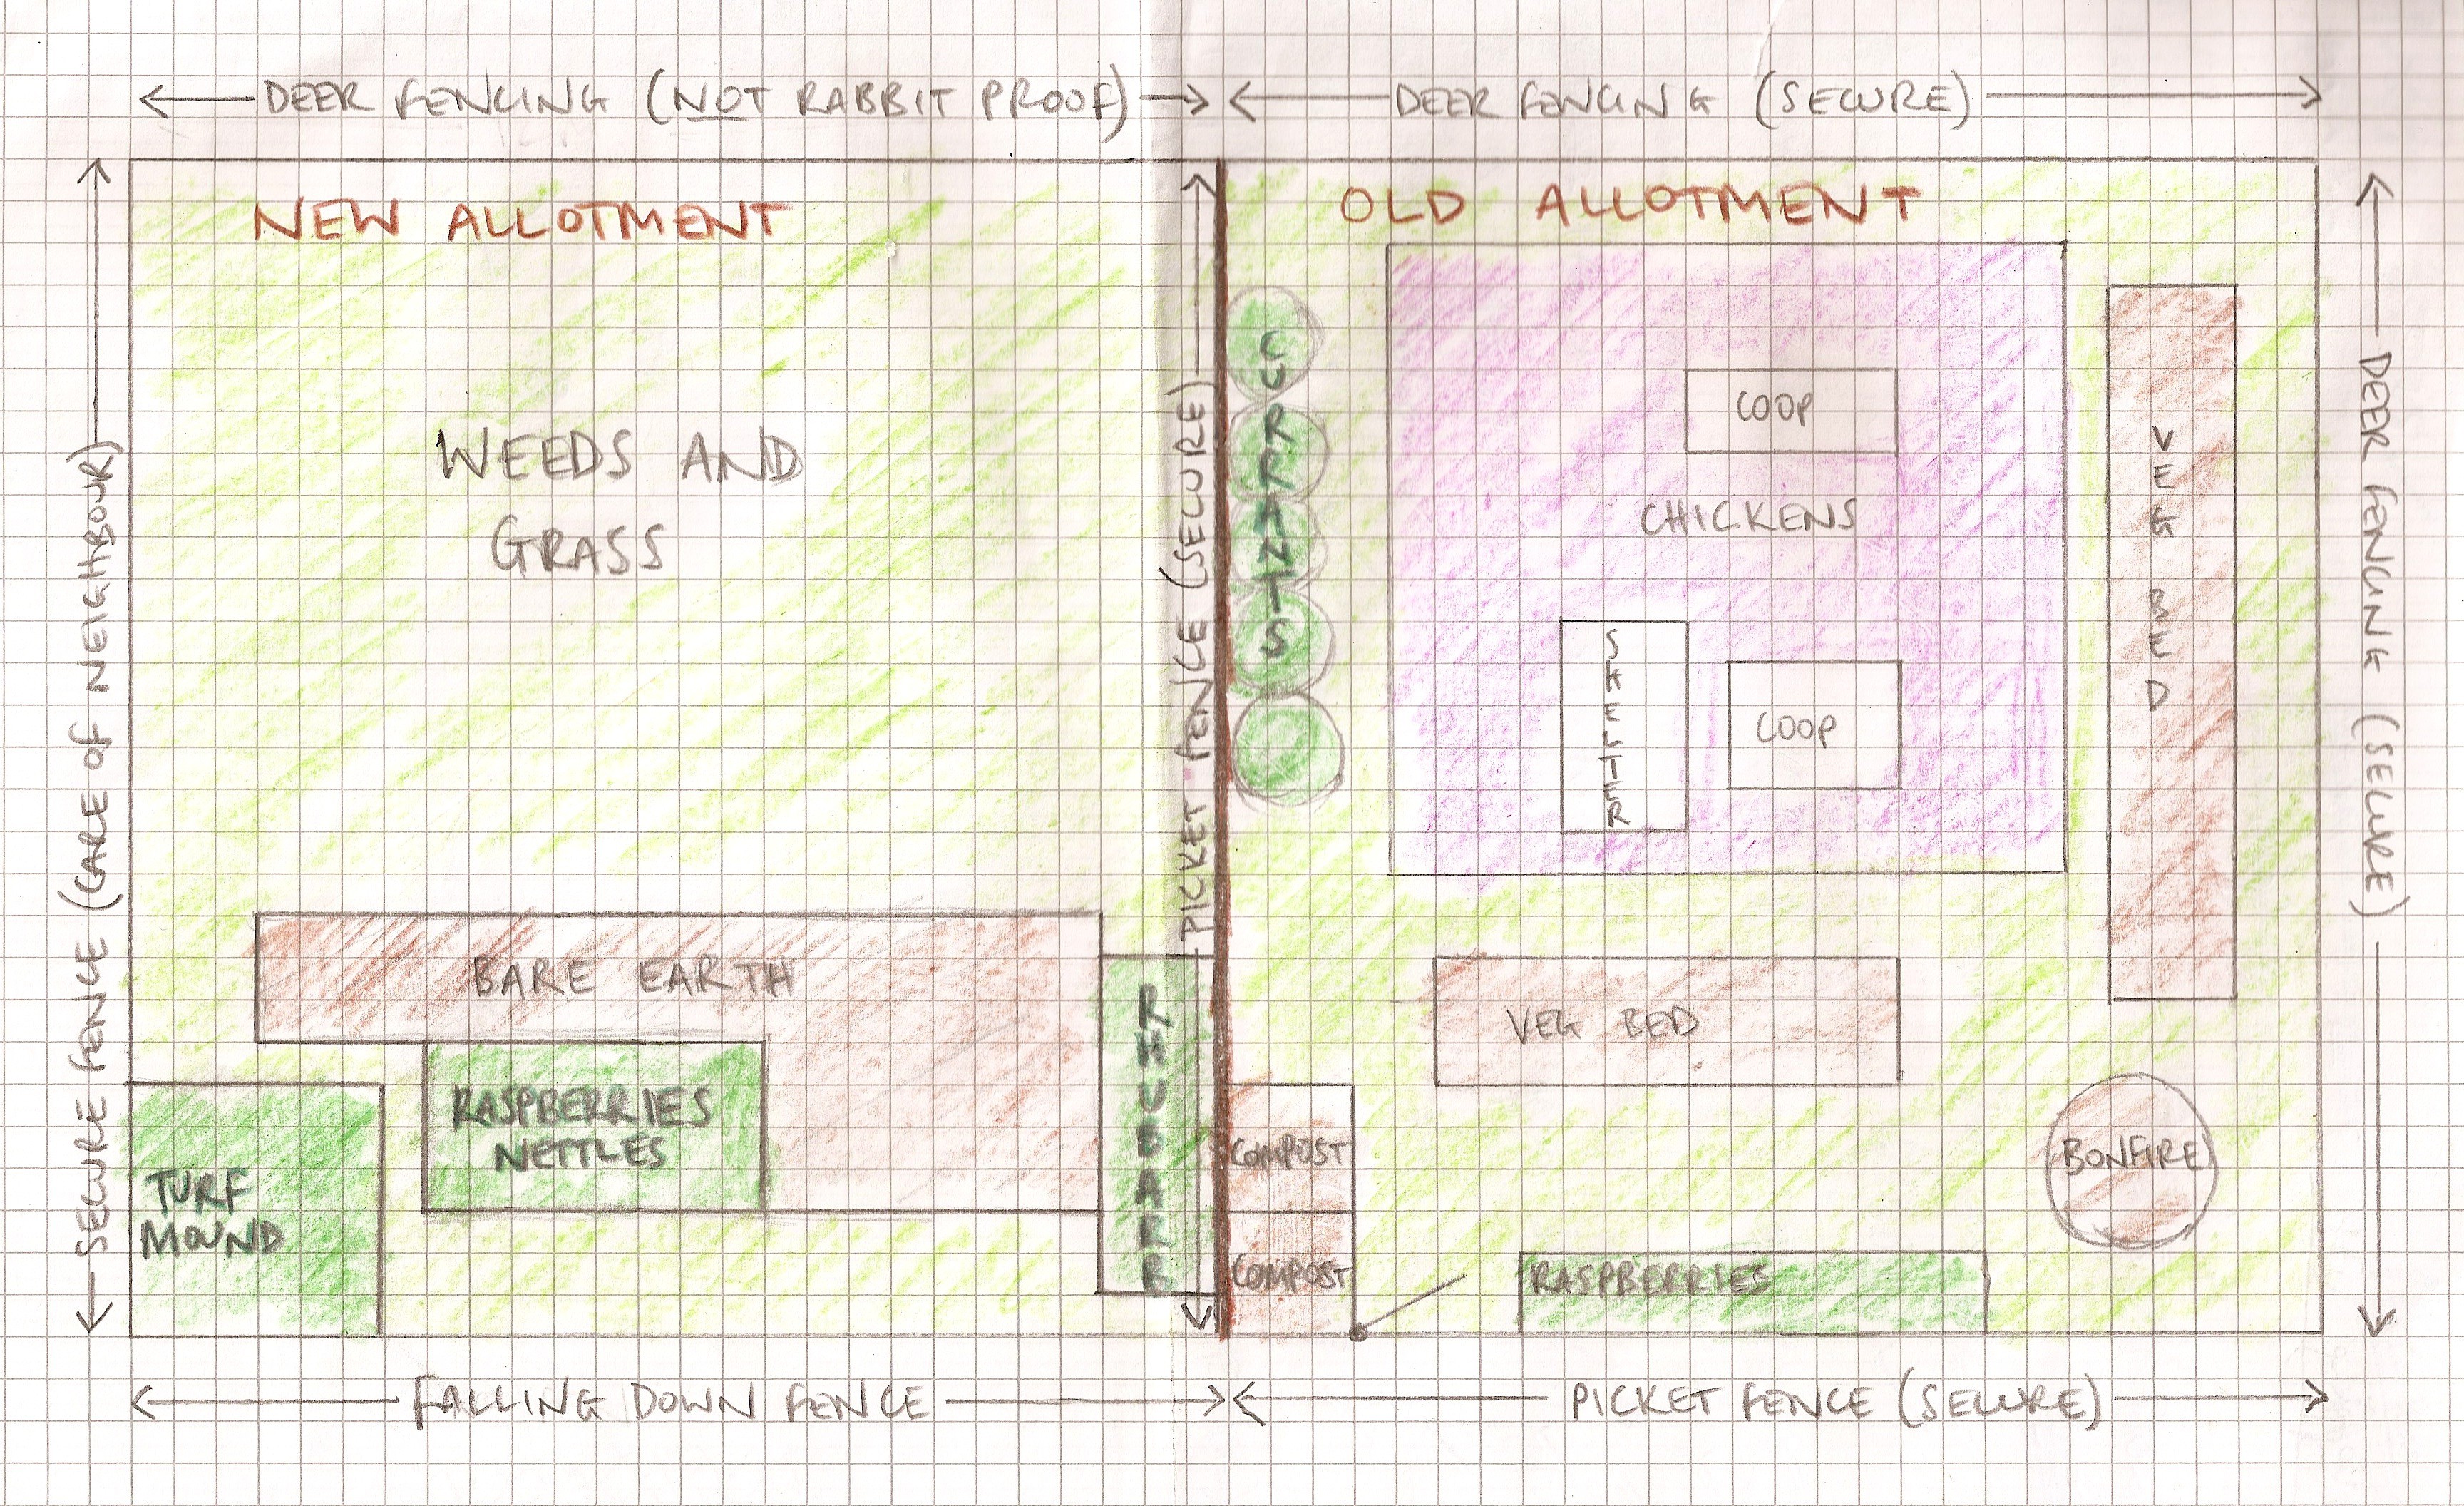
We started by measuring up both plots – 24m x 13m in total and then sketched out what was already there. Not to scale, but good enough to give us an idea and a starting point…….
After a lot of discussion and paper scrunching, we finally arrived at a ‘phase 1’ design for both allotments, with veg beds numbered 1-7. We were very keen to include some flower beds, as we wanted to attract lots of beneficial insects to the garden, as well as a shed to store our tools and the kettle (for those essential cups of tea)! We included a round lawn by the flower bed for a picnic bench and umbrella and were looking forward to eating many meals in the allotment garden – nothing better than freshly picked veg cooked on our portable stove. The beginnings of our plot-to-pot ‘allotment kitchen’! We had always wanted a little orchard too, so three fruit trees were included in the design, one each for our children to choose and plant.
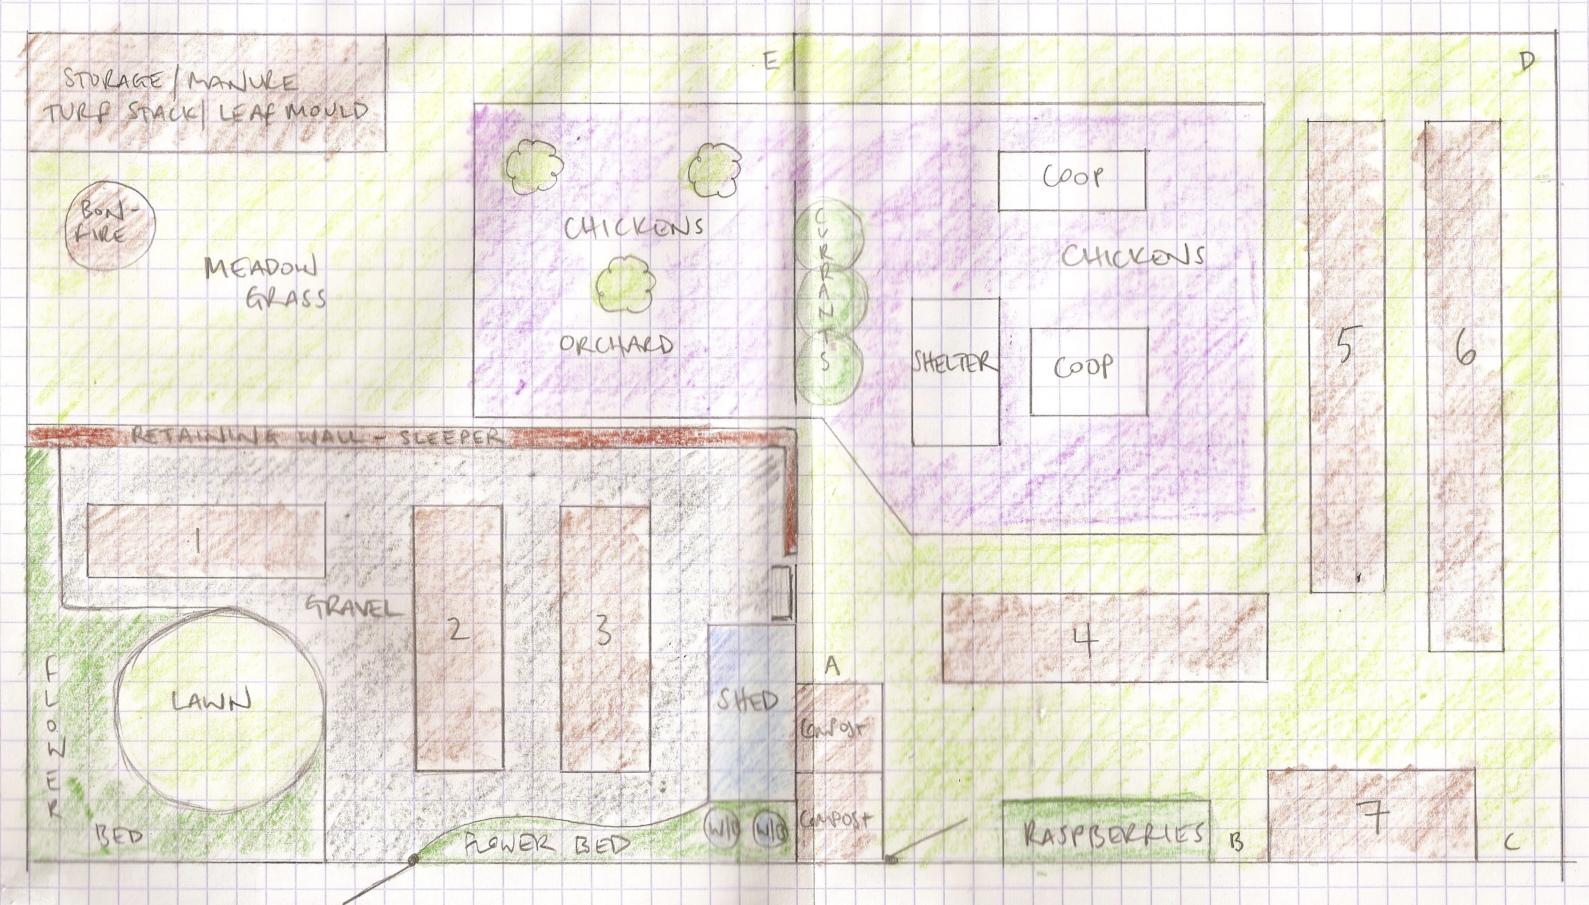
For the time being we were keeping the top section of the new allotment free for deliveries of compost, wood and anything else we might need to store. That area is to be part of our ‘phase 2’ design which we plan to complete in 2015 and will include more veg beds and a pond. But for now, this was enough to be getting on with……..
Coming up
In the next post we start clearing the wonderful weeds and discuss the merits of organic and biodynamic weeding. A much bigger job than we expected…..

Blimey. Amazing job when you look at the pictures above and then the lovely one below through your allotment fence. What an achievement!
LikeLike